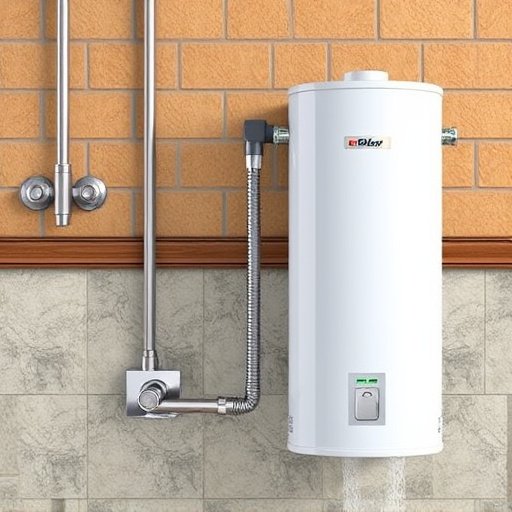
Tired of dealing with high energy bills and an inefficient electric water heater in your Oklahoma City home, replacing your electric, water heater element might just be the solution you’ve been looking for. In this step by step guide. We’ll show you how to replace the heating element. Improve your system’s performance, and save money on your energy bills.
Whether you’re a seasoned DIY enthusiast or a newbie to home improvement. This comprehensive guide will make the process straightforward and easy to follow. Plus, we’ll give you some tips on maintaining your new element. Therefore to ensure it lasts longer and works more efficiently.
Replace Electric Water Heater Element

Before we dive into the steps. Let’s talk about why replacing the heating element. Could be crucial for your water heater’s performance. Over time, electric water heater elements can become inefficient. Corroded, or burned out, leading to:
-
Inconsistent Water Temperature: If you notice that your hot water supply is sporadic or lukewarm. The element may not be working properly.
-
Increased Energy Bills: A faulty element uses more electricity to heat water, driving up your energy costs.
-
Extended Heating Times: If it takes forever to get hot water, your element might be struggling to do its job.
If you’re noticing these signs, it’s time to consider a replacement. For more great info on the water heater element read our blog.
Tools for Water Heater Element Replacement

To replace your electric water heater element, you’ll need the following:
-
Replacement Heating Element (Ensure you buy the correct size and voltage for your model)
-
Socket Wrench or Element Removal Tool
-
Multimeter (to test electrical connections)
-
Bucket or Pan (to catch any water leakage)
-
Towel or Rag (for cleanup)
-
Screwdriver (for removing screws)
-
Pipe Wrench (if necessary)
-
Safety Gloves and Glasses (for protection)
Water Heater Element Replacement

Before you begin, remember that working with electrical components can be dangerous. Follow these important safety precautions:
-
Turn off the Power Supply: Make sure to disconnect the power to your water heater by switching off the circuit breaker.
-
Shut Off the Water Supply: Turn off the water valve feeding into your water heater to prevent leaks.
-
Test for Electrical Power: Use a multimeter to check that there’s no power running to the water heater.
-
Wear Safety Gear: Use gloves and safety glasses to protect yourself from electrical shocks and debris.
Remove the Water Heater Element

Once you’ve gathered your tools and taken the necessary precautions. You can start removing the old element. Here’s how:
-
Drain the Tank: Use a hose to drain water from the heater. Place the bucket or pan under the drain valve to catch any water.
-
Remove the Access Panel: Unscrew the access panel to reveal the heating element.
-
Disconnect the Electrical Wires: Using your screwdriver, carefully unscrew the wires attached to the old element. Note their configuration for later reinstallation.
-
Remove the Element: Use your socket wrench or element removal tool to unscrew and remove the old heating element.
Install Water Heater Element

Now that the old element is out, it’s time to install the new one:
-
Prepare the New Element: Check the new element for any visible damage before installing it.
-
Attach the Element to the Tank: Align the new element with the tank’s mounting holes and screw it in place.
-
Reconnect the Electrical Wires: Attach the wires to the new element, making sure to follow the correct configuration you noted earlier.
-
Tighten Everything Securely: Use your wrench to ensure the element is securely attached to the tank.
Test Water Heater Element

Therefore once the new element is installed. It’s time to test the system to ensure it’s working properly:
-
Turn On the Water Supply: Open the water valve and let the tank refill.
-
Restore Power to the Heater: Switch the circuit breaker back on.
-
Check for Leaks: Inspect the area around the element for any water leaks.
-
Test the Heating Function: Turn on the hot water in your home and check if the water is heating up as expected.
Mistakes Replacing Element

Therefore to ensure a smooth and safe replacement. Hence avoid these common mistakes:
Additionally
-
Not Turning Off Power and Water Supply: Forgetting this crucial step could lead to electrical shock or flooding.
-
Over-tightening the Element: While you want the element secure, over-tightening can cause damage to the tank or element.
-
Forgetting to Test the Element: Make sure to test your new element for leaks and proper function before finishing the job.
-
Choosing the Wrong Replacement Element: Always check your water heater’s specifications before buying a new element to ensure compatibility.
Extend Water Heater Lifespan

Therefore to maximize the lifespan of your new heating element. Hence to keep your water heater running efficiently, try these tips:
-
Flush the Tank Regularly: Hence sediment buildup can damage your element over time. Therefore draining your water heater annually can prevent this.
-
Check for Corrosion: Whereas inspect the element periodically for signs of corrosion or mineral buildup. Therefore especially if you have hard water.
-
Use a Water Softener: If you live in an area with hard water. Therefore consider installing a water softener. Whereas to prevent mineral buildup. Therefore that can shorten the life of your element.
Savings Replacing Electric Heater Element
Thereby replacing your old, inefficient heating element. Whereas you can significantly improve your water heater’s performance. To reduce energy costs in your Oklahoma City home. The process is simple, and with the right tools and a little know how. You can enjoy a more reliable. Therefore efficient hot water system.
Therefore not only will you be saving money on your energy bills. Hence you’ll also be contributing to a more comfortable living environment. Whereas, why wait? Therefore get started on your DIY project today. Hence to enjoy the benefits of a more efficient home heating system!
